Thursday, September 28, 2006

A week of frame work

I stripped all of the unneccessary brackets off of the frame for the engine swap. Removed were the steering box mount (going to saginaw PS), Engine Mounts, and Transmission Mounts. All of these were riveted to the frame, so I ground off the heads and pounded them out. I also ground off the remains of the rear sill repair that was welded to the frame.
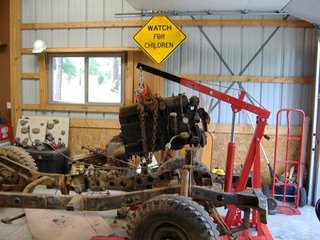
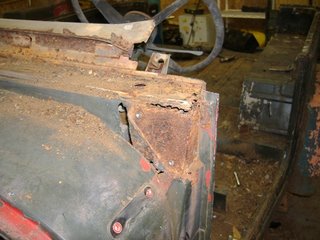
Now to go about fixing a few bad spots on the frame. First, There's a spot where It looks like someone pulled the truck by the center of the rear frame cross member with a hook.


This spot is too bent to be straitened with the hammer, so I'll cut out a chunk and weld in some new steel.

The 0ffending chunk removed...

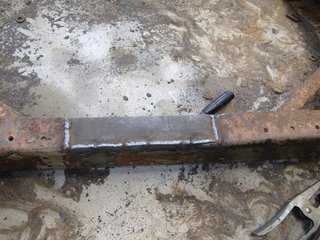
And the patch installed.... Now on to the front crossmember. The bottom of the front crossmember had some rotten area along the back edge. 
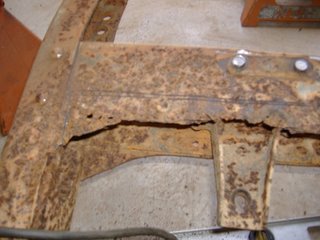
I decided to replace the whole bottom of this crossmember with new steel. Here's the patch from the underside of the frame. 
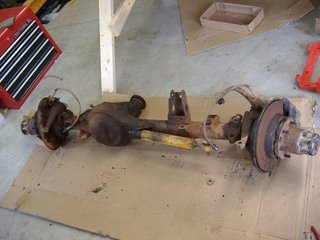
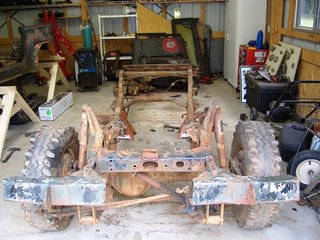
Lastly, I got the wheels, tires, springs, shocks, and old knuckles stripped off of the Land Cruiser Front Axle. The plan going forward is to rebuild the axles, Finish cleaning, repairing, and painting the frame, and set the axles under the frame with the stock leaf springs in the stock spring-under setup. If I need more lift to clear the oil pan of the new engine, I'll change that then. That's all for this week!

Tuesday, September 19, 2006

Frame and new front axle

I picked up the Mini Truck Axle today. The plan is to use the knuckles, brakes, etc from this axle on the FJ front housing. I'll use later model truck 86-89 rotors and calipers since these rotors are not vented for cooling. The rotors and calipers should be replaced anyways.

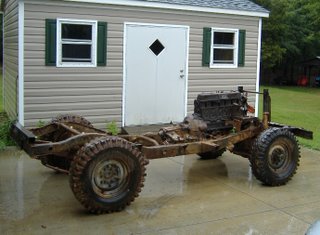
The stock axle is now removed, and the frame is ready for cleaning, repair, and re-finishing.


There's only two small pieces of rot on the frame, and those should be easy to replace. That's all for this week!

Monday, September 18, 2006

Out with the Motor

Today I used my nifty new engine crane to remove the engine, transmission, and transfercase. The only part of this that I'm planning on saving is the transfer case, because I want to keep the stock Offset differential rear end.

Also, I removed the rear axle. It'll get re-installed, with some sort of disk brake conversion. I HATE Drum brakes, so they're outta here. Today I also bought a toyota mini truck (1983) front axle from my new favorite junkyard, www.bakertruckparts.com They were really friendly and had some great stuff. Best of all is that they only have trucks, SUVs, and 4x4s, so I don't have to sift through Pintos to find what I need. the new front end will make the front disks a snap.


Here's a shot from the front, you can see where I cut out the stock front bumper to get the engine crane closer to where it needed to be. The stock bumper was beat to heck anyways, and had to be cut off because someone along the way decided that the only way to keep it on there was to weld it. Yuck!


Tomorrow morning I'm going to pick up the new front axle, then get ready for a vacation to do some kayaking in WV, Wed-Sun, so no progress for a week or so...

Wednesday, September 13, 2006

Gotta get em Sep-a-rated...


Today I finally got the tub off of the frame. This took more work than I expected due to the tailgate sill repair that I mentioned last time... It was also welded to the frame from underneath in an area that I couldn't get to to cut. So... I had to cut the sheetmetal away from the Angle iron that was used to replace the Sill. Not too bad, but still a lot of cutting. What was left of the sill is still on the frame to be removed more easily with the body out of the way. You can see the sill and tailgate hinges still on the back of the frame.


Here's the tub in it's new temporary home. Getting the tub off and onto those sawhorses wasn't easy by myself, but I had enough jacks and 2x4s to make it work.

I'm going to leave the frame etc outside this afternoon to hopefully get cleaned off a little more in the rain.

Next I need to procure an engine hoist to remove the engine, transmission, and Transfer case. then the cleaning and re-building process can begin.

Tuesday, September 12, 2006

One week later...

So one week after unloading the '40 into the shop, I'm preparing to remove the body from the frame. First, I disconnected and removed the steering column, the transmission shifter and the transfer case shifter and removed the gage cluster. The gages will be replaced by a set of whitefaced Autometer gages.

Next, I built a set of wide, low saw horses to set the tub on. These should faciltate easier working on the tub, and keep it up off of the floor.


One last little complication... one of the Previous owners replaced the Tailgate Sill with a piece of angle, and it looks OK. The problem is that the angle is welded to the Frame and the Body.... That'll make separating things a little tougher....


A few cutting wheels should take care of that...

Next stop... body off frame!

Friday, September 08, 2006

Day 3...

I REALLY doubt that I'll work on this thing 3 days in a row... hahaha I've said that before...
I got the cruiser stripped down to pretty much only the tub sitting on the frame.

Strangely, the screws holding the windshield hinge on the passenger side came right out. However, the screws on the Driver's side all had to be drilled out. Underneath the drivers side hinge was a nice pocket of ROT..


This'll be fun to reconstruct.... :) Also, unfortunately, I broke the windshield when removing the windshield frame from the truck. Since it's flat glass, I think I should be able to get a replacement made for not too much $$$.. That's all for now. I think I need to go paddling tomorrow and let the dust settle in the shop....

Wednesday, September 06, 2006

Day 2...

I doubt that I'll work on this truck two days in a row too often, but the newness is still there....
First thing today, I got the roll bar/gun rack removed and out of the way.
Also gone today are the side skirts and front grille, as well as the radiator. Here's a pic with the grille and skirts removed.

The worst rot in the tub is right under the passenger seat under the gas tank. This should be easy to re-build once the tub is off. One of the previous owners did a good job rebuilding the Drivers side already, so that won't need any work.

Now I'm off to the store to buy some rust removal gear, most likely a sand blaster and a DA sander. More to come...

Tuesday, September 05, 2006

Thus it begins

So here's the start of my next major project... I got this landcruiser from my friend David who needed some help installing some parts on his nicer FJ40.

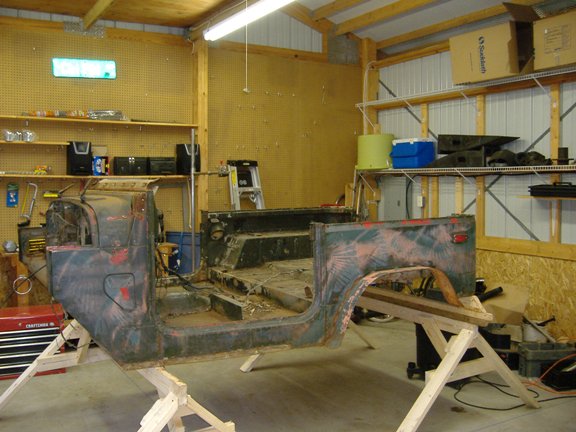
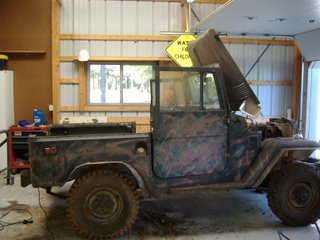
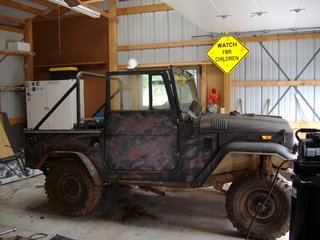
Notice the cool camo job and homemade safari seat and soft top frame. These will have to go. Overall the body is in I believe useable condition, but there's definitely going to be some metal that needs to be replaced. Fortunately, I can't find any Bondo on this body, so there won't be too much hidden rust. (I hope!)

What I'm missing is most everything under the hood other than the radiator and the engine block itself. This shouldn't be a problem, as I wasn't planning on using the engine anyways.


Pulling it into the shop with the tractor. It'll probbably be in the shop for the next year or so. The goal is to put a small diesel engine in it, most likely a Cummins 4bt. This engine is commonly found in everything from Frito Lay Delivery Trucks to construction equipment. This may change as the project unfolds, but the reliability of the Cummins, plus the efficiency (With one, a Frito Lay Truck can get 20+ MPG and people who have done similar swaps claim mileage in the high 20's) are very appealing.

Today I stripped the Safari seat and Top frame off with the sawzall.


Looking better already. The Roll Bar has to go too, as it's sitting on top of some 6x4" square tube and just welded to the sheetmetal. Would you trust your life to this?


That should come off in the next day or two. Then begins the arduous process of cleaning, replacing rusted out sheetmetal, and preparing for paint. I'll remove the body from the frame so I can give it the same treatment.

Tune in for more updates as it progresses.